I’ve made cake balls several times now since my first batch of football shaped cake balls. I think it must have been beginners’ luck because since then, I haven’t been all that happy with how they’ve turned out. Most recently I made cake balls in the shape of little pumpkins for a bake sale at work, and although they looked kinda cute, I thought I was going to go crazy trying to coat them – they didn’t hold together very well and the coating was not working out. But I decided to make them again for the Garden Club Christmas Party this past week and decided to experiment with a tweaks to the process hoping that they would turn out better.
The basic recipe is a piece of cake (I’m so punny. LOL) – one boxed cake mix prepared according to package directions and one tub of premade frosting. (You can find my original recipe here.)
The first tweak I made was to bake the cake for the maximum time listed for the 9 x 13 pan. If I am actually making a cake, I usually bake it towards the lesser amount of time to keep the cake from getting too dried out. For cake balls, since we’re adding the frosting anyway, having it a bit drier really helped the cake ball hold together much better! And speaking of frosting, I only used about 3/4 of the frosting in the can. That helped them hold together better too. Yay! Success #1 ![]()
So the next step is to scoop them out and shape them. I found that the fastest way to do this is to scoop them all out first onto a large baking sheet, then roll them.
Now if you are anything like me and obsess over trying to get them into perfect little orbs, I found that if I rolled them in my hand one direction and then reverse directions, they tend to be more spherical and less trapezoidal. And before you know it, you will have a beautiful pan full of happy little cake balls.
Note: Don’t feel as if you have to line them up on the pan like I do. My high school band director would have been proud. ![]()
Anyway, the next step is to place them fridge for several hours to thoroughly chill.
Now for the coating – the most frustrating aspect of cake balls for me. The first time I made cake balls I used Almond Bark that I got from the grocery store, but I’ll be honest…I don’t LOVE the taste of almond bark. And for my little pumpkin cake balls I tried using orange Wilton candy melts. The problem with that was it was way to thick. I tried thinning it with a little canola oil, but then the coating became less opaque and you could kinda see the cake through the coating. Not happy. But the last time I went to Hobby Lobby I found these candy melts especially for use in fondue pots and fountains so I decided to give them a try.
OK. So next I put a small amount of chips into a make-shift double boiler (glass dish over a saucepan of barely simmering water). I was very pleased with the consistency of these melting chips – they melted smoothly and it was just the right viscosity. Oh and it tasted pretty good too. ![]()
Now I have no scientific or culinary evidence to back this up, but I believe that using a double boiler works better than microwaving at melting the chocolate. And by having the coating in the double boiler, it stays warm and prevents the coating from getting too thick and then having to stop and re-nuke it.
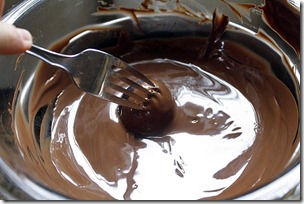
And when it came to the actual dipping technique, what I did was drop the cake balls in one at a time and roll them around the in coating with a fork and/or spoon the chocolate over.
Once completely coated, I carefully lifted the cake ball out with the fork and gently tapped the fork on the side of the bowl to let the excess coating drip off.
And finally placed the coated cake ball back on the tray.
Or plate – these were a few of my coating testers. ![]()
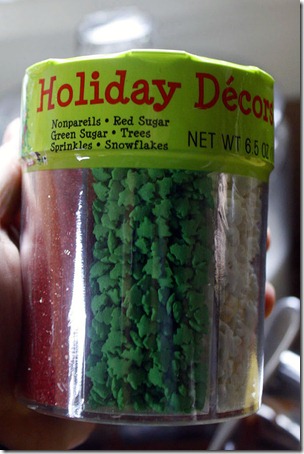
So next, because I wanted these to be Christmas cake balls, I got this nifty container of holiday sprinkles from Tar-jay.
I sprinkled a few of these cuties onto the cake balls before the coating set up. Yay! Success #2!
The brightly colored sprinkles worked best, the colored sugars seemed to just blend in.
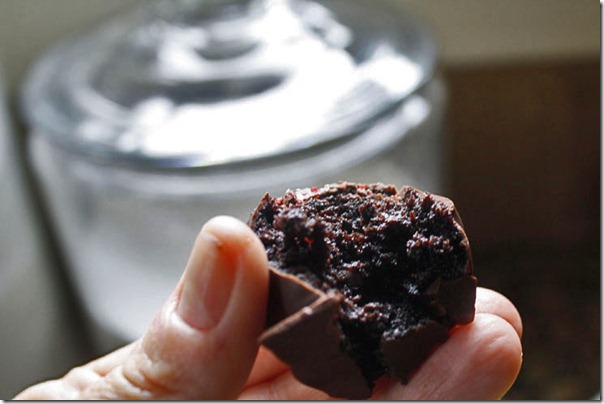
But no matter how freaking cute these little babies are, the most important thing is how it tastes. And they taste like little chocolate-y bites of heaven!
The last thing I did for the Christmas party was to place each cake ball into a mini-cupcake liner. So stinkin’ cute! ![]()
Just to recap – here are my tips for making cake balls.
- Bake the cake for the maximum time called for your size pan.
- Start with 3/4 of the frosting and as more only as needed.
- Scoop them all out then roll into balls.
- Chill well.
- Use a double boiler rather than microwaving.
So as you are probably aware by now, making things harder than they need to be is a specialty of mine. But these really are very easy to make and a lot of fun…without or without the obsessing. ![]()
Enjoy!
Kelly


I made some for the Owasso church bazaar this year and also found the Wilton orange melts a little too thick even over the double boiler. (I use the same dbl. boiling system as you do! lol!) Thanks for the tip about the other melts from HL! Here’s a tip for you from me! I always give my undipped cakeballs a timeout in the deep freezer. They don’t completely freeze hard, but seem to stand up to the hot chocolate coating a little better.
Also, have you ever tried Chocolate Butter Recipe Cake with the Caramel Pecan Frosting combo for cakeballs? Oh-em-gee!!!
Or Carrot Cake with Cream Cheese Frosting? Oh-em-gee, too!!!
thanks for the tip susan!! i’m so glad you had the same experience with the orange and it’s not just me. LOL oh and i haven’t tried the carrot cake/cream cheese ones yet, but one of my girlfriends at work was telling me about them. OMG is right – they are next on the list! LOL 🙂