Most of the time, if I’m in the mood for a frozen treat, a Skinny Cow ice cream sandwich or bowl of chocolate chip frozen yogurt is just the thing to get the job done.
But sometimes, I want the real deal.
Now there are a few foods that I feel like I can speak about with some authority. For example, I know what really good crusty, artisan bread should taste like. Likewise, ice cream is one of those things – it’s somewhat sacred at my house. Momma knows good ice cream.
So if I’m going splurge and enjoy a bowl of ice cream, it better be good. If I’m going to go through the trouble of actually making ice cream – it better be perfect. And I think this vanilla ice cream is about as good at it gets, so I thought I would share it with you.
The basic ingredients are pretty typical – milk, sugar, cream, eggs. And this is a cooked, custard-style ice cream base so you have to plan ahead a little bit, but TRUST me…this ice cream is so creamy, and so smooth, and so delicious. It’s TOTALLY worth it.
Here is all you need:
- 2 cups whole milk
- 1 1/2 cups sugar
- 6 egg yolks
- 1/2 tsp salt
- 1 tbsp vanilla
- 4 cups (1 quart) heavy whipping cream
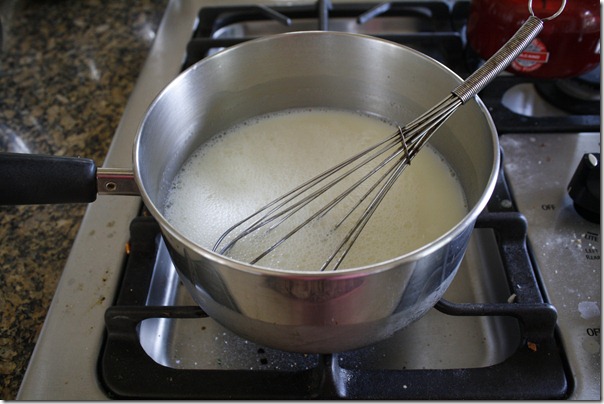
First, in a medium saucepan, whisk together the milk and sugar over low heat until the sugar is dissolved and milk is hot (not boiling, just heated through).
Meanwhile, separate 6 eggs and place the yolks in a large bowl. Whisk vigorously until eggs are smooth and a little lighter in color.
Next we have to temper the eggs.
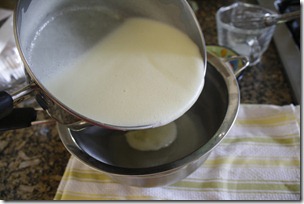
The thing is, you can’t just pour in the hot milk all at once – otherwise you’d end up with milky, scrambley egg ice cream which would not be yummy. So I’ve found the easiest way to add the hot milk is to set the bowl of egg yolks on a damp towel so the bowl won’t skid around on the countertop. Hold the saucepan in your left hand and a whisk in the right. Now VERY slowly drizzle about 1/4 cup of the hot milk into the eggs and quickly whisk. Once the milk is incorporated, slowly add a bit more and whisk again. Repeat this process until all the milk has been added. (After about 1/2 of the milk has been incorporated, you can add a little more milk at a time.)
This is what it will look like once all the milk has been incorporated. (I will tell you that it doesn’t have to be quite this foamy. I was whisking pretty vigorously – ever the overachiever.)
Now, pour the custard mixture back into the sauce pan and place over medium-low heat. This next step is a bit tricky, but it’s not hard…we just have to heat the custard until it thickens a bit (thick like eggnog, not like pudding). It only takes 5 or 10 minutes, but you have to stir constantly and watch it carefully. You can kind of start to smell when it starts to thicken, and it will coat the back of a spoon. Just don’t let it go too long or the eggs will set up and scramble (I know this from personal experience.) Once the custard has thickened, strain it through a fine mesh sieve back into a large bowl (there are always a few bits of cooked egg in the mix).
OK, now take a big deep breath because the hard part is over!!
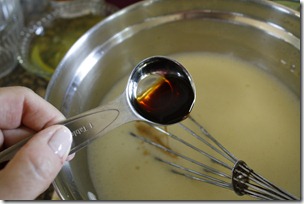
Now, to the cooked custard, add 1/2 tsp salt and 1 tbsp of vanilla. Then slowly mix in the entire quart of heavy whipping cream. Once all the ingredients are mixed, place the ice cream base into lidded containers and refrigerate overnight.
*screeching to a halt car noise*
Wait! huh?!!! You mean you got me all worked up for ice cream and now I have to wait until tomorrow??? WTH?
Well I said it was delicious – I didn’t say it was fast.
Here’s the thing…as much as it hurts, refrigerating it overnight improves the texture and flavor tremendously. No joke. I wouldn’t make you do this if it wasn’t worth it. It’s totally worth it! I promise!
OK. OK. OK. If you absolutely, positively have to have this ice cream tonight, you can set the bowl of cooked custard into larger bowl filled with ice and stir it frequently until it’s cold (probably a good 30 or 45 minutes). Once the custard is cooled add the salt, vanilla, and cream.
Anyway, the next day (ahem) when you’re ready to make the dreamiest, most delicious homemade vanilla ice cream you’ve ever tasted, get out your ice cream freezer of choice. At home I use this countertop Krups number, but at the lake we have one of the old school, ice/rock salt models. Either works fine. If you’re using a countertop model, it will only hold about 3 cups of ice cream base (1/2 of the batch). Don’t ask me how I know this – just take my word for it. If you’re using the old fashioned kind, you can pour in the whole batch.
Let it do it’s thing (mine took about 45 minutes), and once it’s mostly frozen you have several options.
You can:
a) serve and eat the ice cream immediately in its slightly soft-serve state.
b) transfer to a lidded container and freeze for a couple of hours.
c) transfer half of the ice cream to a lidded container and add 1/4 cup of finely chopped, chocolate covered espresso beans
I chose b and c.
Whatever you do, don’t start eating the chocolate covered espresso beans out of the bag. You’ll just have to trust me on this too.
Feel free to serve and enjoy this heavenly vanilla ice cream with fresh Porter peaches or nectarines which are so deliciously in season right now.
Chocolate espresso bean ice cream needs nothing at all.
Good thing I have exercise boot camp all next week!!
Enjoy!!
Kelly


Thank you! I finally found the perfect recipe! I cut it in half for a 1.5qt ice cream maker. I used 4 egg yolks. I didn’t chill the mixture over night though. I chilled it 4 hours. It came out perfect!
Yay!! I’m so happy to know you loved it!